How do I import from Excel/CSV? (video)
- Click the
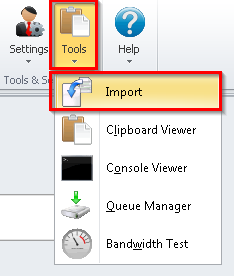
'Tools'button from the main ribbon toolbar and select'Import'. - Select the type of entity you would like to import. Here you can select between
'Contacts or Companies','Projects'and'Tasks'. - Select the import source. Here you can choose to import from
'CSV file','Excel file'or'Outlook'. - Click the
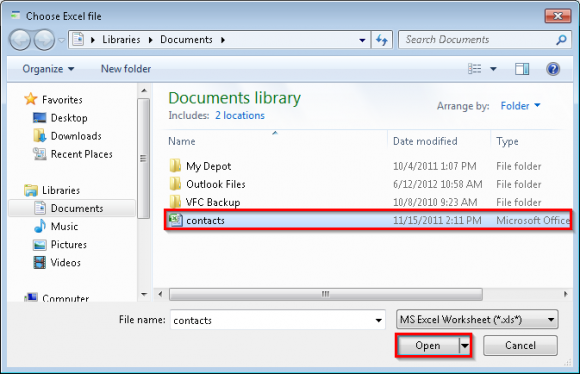
'Browse...'button and select the file or folder(s). - Select the Excel/CSV file and click
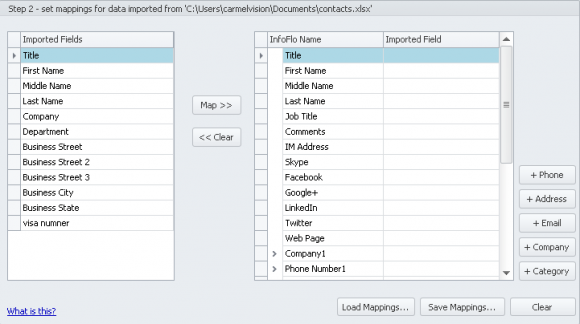
'Open'or double-click the Excel/CSV file. - In Step 2 you will map the fields from the imported file to the fields within InfoFlo.
- The Excel/CSV fields will be on the left listview, and the InfoFlo Fields will be on the right listview. In order to begin the import, the fields from the CSV/Excel file will have to be mapped to the fields in InfoFlo.
- Click a field name from the Excel/CSV file, click the equivalent InfoFlo field name and click
'Map >>'to establish the mapping. - Continue to do the above step for all fields that need to be imported.
- You can add as many email addresses, post addresses, phone numbers, companies and categories to imported contact. For example, to add another email address click on
'+ Email', as a result field named'Email Address 2'will be added at the bottom of right table. - In
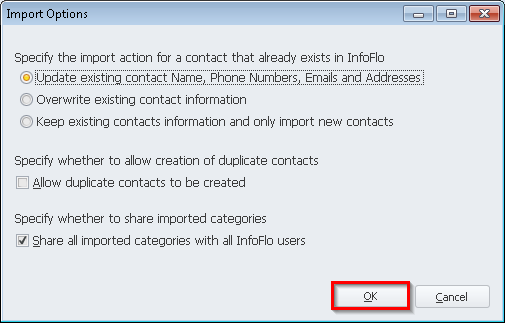
'Step 3', you can set you advanced import options by clicking'Advanced Options'. - Here in the Advanced Import Options screen, you can choose to update, overwrite or keep existing contact information; As well as allow duplicate contacts and share imported categories automatically. Click
'OK'to confirm changes and close the Advanced Import Options window. - When you are ready to start the import process, begin Step 4 by clicking the
'Import'button (As always, please remember to backup your InfoFlo database before importing!) The CSV/Excel file should now be imported into InfoFlo.


