Getting Started
Search Knowledge Base by Keyword
Welcome to InfoFloTalk – Where we do VoIP right and save you money every month
Before going through the steps in this guide you should of already either received a call or an email from us indicating that your InfoFloTalk instance is ready to go. The steps in this guide will walk you through initial system setup from adding extensions, to configuring a basic call workflow, as well as how to setup your VoIP phone, softphone running on a PC or a softphone app running on a smartphone. This setup should take approx 15-25 mins after which you will be able to fully utilize your new service with a couple of extensions, one ring group and a simple call workflow that rings both extensions when a new call comes in.
Lets jump right in …
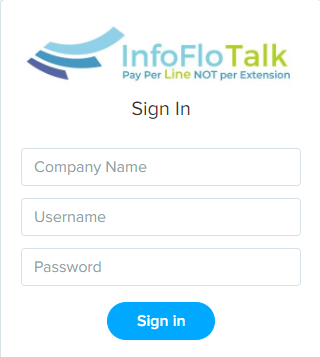
Login to InfoFloTalk portal
As part of our initial setup we automatically configure an extension to be used for administration. This extension is setup with admin permissions allowing the user access to the administration panel. Click here to connect directly to the portal. The login page will look as in the image below. Values for all three of these fields are required and are supplied in the email we send out when your system is ready to go.
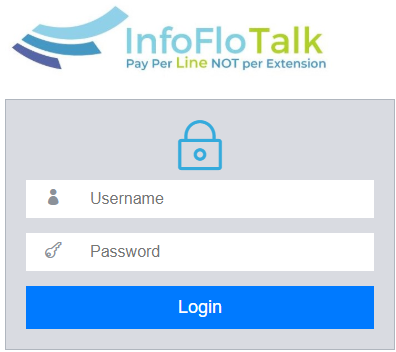
We will focus on the admin side of the portal and then return to this main dashboard app which will fill up with data as new contacts/calls/voicemails/chats/sms/notes/presence data flows into the system. From the left menu click on the![]() Admin button. The admin page will attempt to open in a new browser windows so please make sure to allow popups for this site if you have an ad blocker installed on your browser. The admin login screen will look like the image below. Again, please re-enter the two values as per the email you got from us.
Admin button. The admin page will attempt to open in a new browser windows so please make sure to allow popups for this site if you have an ad blocker installed on your browser. The admin login screen will look like the image below. Again, please re-enter the two values as per the email you got from us.
Once the 2 step verification process is complete and the user is authenticated you will be presented with the main admin menu as shown below.

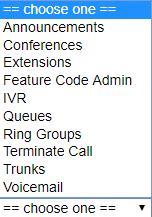
This menu is the main starting point to setup call workflow, extensions, ring groups, queues, digital receptions, company directory, conferencing, music on hold and many more features. As advertised, there is no limit to the number of any of these these objects that can be created. In other words, any number of extensions, ring groups, etc… can be created and used as part of the call workflow. The best way to setup InfoFloTalk is to clearly map out the call workflow and have all extension information ready ahead of time. This will save time and require less modifications later.
Creating An Extension
Click on the extensions button, make sure Generic SIP Device is selected from the drop down and click the submit button. All the fields on this form have context sensitive help so simply hover over the label to get more details. There are alot of advanced settings here that can be tweaked so we will just stick to the basics at this time. Below are the minimal fields required to setup the extension.
- User Extension – Enter any value for the extension number of the user (we usually recommend to start with extension 101)
- Display Name – The first and last name of the user of this extension
- SIP Alias – Same value as was entered in the user extension field above
- Outbound CID – Caller ID to be displayed on the receiver end when making an outbound call from this extension. The value has to be in the following format “NAME” <NUMBER>. For example “InfoFlo Solutions” <4162234353>. Make sure the NAME is not long and that there are no dashes or brackets in the NUMBER. Keep in mind that every extension can have a different outbound caller ID so this is really useful if each user has a direct dial inbound number.
- secret – This is the password to be used both to register a phone to this extension as well as to login to the InfoFloTalk portal. It is considered good practice to utilize strong passwords here. We recommend a minimum of 16 characters. Its best to use a site such as here that will auto generate random password. This strong password can be auto-saved by the browser as well by the phone so the user does not need keep a record of this password.
- nat – make sure this option is set to YES.
- Record Incoming – set to either Always or Never. Setting this to always will record every incoming call to this extension.
- Record Outgoing– set to either Always or Never. Setting this to always will record every outgoing call from this extension.
The Voicemail & Directory section of the extension form is used to optionally setup voicemail on the current extension. Please see image below for fields required for enabling this option.
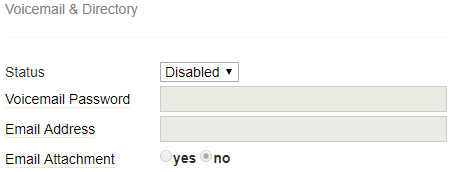
Simply, make sure Status is set to enable, enter the extension number as the voicemail password (strong password is not required here), enter the user’s email address in the email address field for voicemail delivery via email, and optionally set email attachment to yes to force the voicemail to be attached to the email.
Press the ![]() button at the very bottom to save changes, and then click on the
button at the very bottom to save changes, and then click on the ![]() to have the changes take affect immediately.
to have the changes take affect immediately.
Repeat this process for all other extensions. to edit an extension, select the extension from the list on the right and don’t forget to save changes when done.
Setting up a Ring Group
A ring group is a collection of extensions that behave as a single entity with respect to a ring strategy. For example a sales team fielding inbound calls can be setup as a ring group where all extensions ring simultaneously on a new inbound call. The different ring strategies are displayed below and can be selected from the ring strategy pull down list.
- ringall – ring all extensions simultaniously
- hunt – ring extensions one at a time
- memory hunt – ring first extension, if no answer ring first and second extension, if no answer ring first second and third extensions .. etc
- first available – ring the first extension that is online from the ring group
- firstnotonphone – ring the first extension that is not currently on the phone
To create a new ring group click on the Ring Groups button from the main menu and click the Add Ring Group link form the right. The Ring-Group Number field should be automatically filled in. Select Ring Strategy as per description above. Set the Ring Time for the group, the default value is 20 seconds. From the Extension Quick Pick pull down list select the extensions to add to this ring group. Note that external numbers can also be added to this ring group. The call workflow for this ring group is set using the Destination if no answer section at the bottom of the form. If the ring time has elapsed, then the call we flow into the destination selected here. Clicking voicemail from the list below will re-direct the call to the voicemail box we setup above. Any other entities such as extensions, Queues, Conferences, etc… can be setup as a destination, however that setup is beyond the scope of this guide.
Press the ![]() button at the very bottom to save changes, and then click on the
button at the very bottom to save changes, and then click on the ![]() to have the changes take affect immediately.
to have the changes take affect immediately.
Setting up an Inbound Route
Inbound routes are used to initiate the call workflow once an inbound call on a given DID (phone number) is coming into InfoFloTalk. On initial system setup, we preconfigure all inbound routes for each phone number and route them all to the first system extension we create. Once the entire call workflow is setup all that is left to do is hookup the inbound routes to the proper destination such as a digital receptionist, call queue, etc… Clicking the Inbound Routes button from the main menu will display all phone numbers on the right. Click on a phone number to edit the given inbound route.
Please make sure not to edit the Description and the DID number fields. Any changes here will disrupt system functionality where calls will be dropped by the system.
There are lots of interesting options on inbound routes such as appending a prefix to the inbound caller ID, setting on hold music and more. Again, these are beyond the scope of this guide.
The call workflow for each inbound route is set using the Set Destination section. As we saw in the ring group the destination can be set to any other entity (digital receptionist, extension, time condition, voicemail, etc…) previously configured. Once the destination receives the inbound call it works through its config and send off the call to the next hop in the chain.
There are really no limits to what can be done with Inbound Routes, we made it extremely flexible to so it can support an almost unlimited combinations of workflow circuits.
Registering an extension on a VoIP phone
InfoFloTalk supports any and all VoIP devices as long as they are SIP compatible. Softphone (phone app running on PC or smartphone) can also be used, please click here for more details. Analog phones require an additional piece of hardware called an ATA adapter. Customers with existing VoIP phones coming over from other carriers such as RingCentral, Vonage, 8×8, etc… need to make sure the devices are not locked by the current provider.
The config example below uses a Yealink T21P device with 2 lines.
Step 1: Find the IP address of the phone using the menu system of the device itself. This varies from phone to phone depending on the brand. A quick google search will return the steps required. Its usually a couple of clicks away for instance on the Yealink its menu -> status.
Step 2: connect to the web config of the phone using a browser by pointing your browser to http://PHONE_IP or https://PHONE_IP where PHONE_IP is the ip address of the phone from step 1.
Step 3: reset the phone to factory settings. This step is not needed if the phone is new. It is important if the device was previously registered with another carrier.
Step 4: register using the extension number and secret from the extension setup step above. The host name to be used will be sent in the welcome email. The host name will be in the form of CUSTOMER_NAME.infoflotalk.com, where CUSTOMER_NAME is the the company/organization name that signed up for the service.
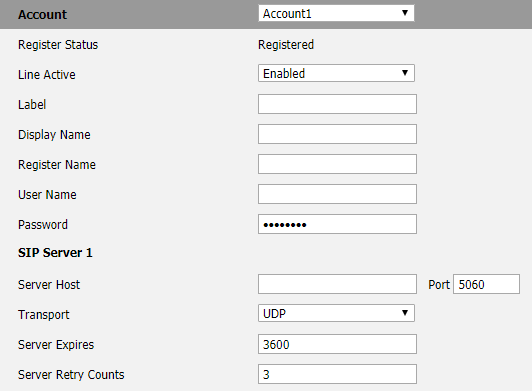
The account setup page looks like the image below on the Yealink phone. The Label, Display Name, Register Name, are normally set to the extension number. These values are used internally by the phone to display data such as the value to be displayed on the phone interface. The User Name must be set to the extension number setup in InfoFloTalk. This value is used to authenticate the user when the phone is attempting to register with the system. Same for the Password field, this should be copied and pasted from the InfoFloTalk admin interface to make sure the values match. The Server Host is the InfoFloTalk hostname as provided in the intro email. The host name will be in the form of CUSTOMER_NAME.infoflotalk.com, where CUSTOMER_NAME is the the company/organization name that signed up for the service. The Port should be left with its default value of 5060. The Transport should be left with its default value of UDP.
When the phone successfully registers the Register Status with change to Registered. Also, the extension will show up as green in the status tab of InfoFloTalk when clicking on the Status button from the main menu.
These options will be a little be different depending on the hardware. We are happy to try and help with any issues related to phone registration, we know this step can sometimes be a bit frustrating. Assistance with up to 2 phones is free of charge.
For any other questions or technical queries please email our support team at: support@infoflotalk.com