Send & Receive
Search Knowledge Base by Keyword
Instructions for using InfoFlo Talk Faxing Services
Sending/receiving fax via portal:
- The portal will store all faxes, even if they have been deleted as email. To access the portal please use the following parameters:
- browse to portal
- login with Username and Password as provided in intro email sent out.
Sending/receiving fax via email:
- Email-to-Fax supports up to 5 attachments. Attachments may be sent in JPG, PDF, Adobe PostScript, TIFF, Microsoft Word, Excel, CSV, HTML & Plain Text formats.
- To field of email should look like To: <Recipient_10_digit_number>@emailyourfax.com where <Recipient_10_digit_number> is the destination fax number. For instance, 4165199554@emailyourfax.com
- Subject field of the email should look like Subject: <Sending_10 digit_fax_number> where <Sending_10 digit_fax_number> is your fax number
- Upon submission our system will reply with a confirmation or rejection notice.
- Inbound faxes will be delivered directly to your inbox
Initially, the only email address with permissions to receive faxes is the email address of the main user. For enhanced security and validation we do not allow users to manually add email addresses that are allowed to receive faxes. Please send us a list of emails to enable for receiving and we will do it for you.
Setup additional email addresses to send faxes:
- From portal click on Fax From Emails link on the right
- Add the email address and click on “Add Email” button
- To remove an email address click the “Remove” checkbox to the right of the email address and click “Remove”
Setup sent receipt for fax delivered via portal
- Use the send a fax wizard to compose the fax by creating cover pages & attaching file
- check the “post processing email notification” checkbox under the green send a fax button (see image below), and select an email address from the pull down list
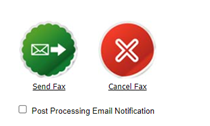
- Click the green send button
- An email receipt will be sent to the email address specified above when sent operation is completed.
Share